
The Mysterious Story Of The 1811 Ratcliffe Highway Murders
It’s the winter of 1811 in the poor East End of London. Londoners are preparing for the Christmas season, and going about their daily back-breaking business.
What they didn’t yet know was that before the holiday season was over, the entire East End of London would be rocked by a vicious and brutal series of attacks.
The Ratcliffe Highway Murders were coming, and before Jack the Ripper was even born, they would change crime in London forever.

I use AI to generate images to help you imagine the scenes we don’t have photographs of. They may not be 100% accurate, but are used to create an atmospheric sense of history. When I create images of people we don’t have photographs of, I intend it with the utmost respect and use real photos when available.
The Ratcliffe Highway, London
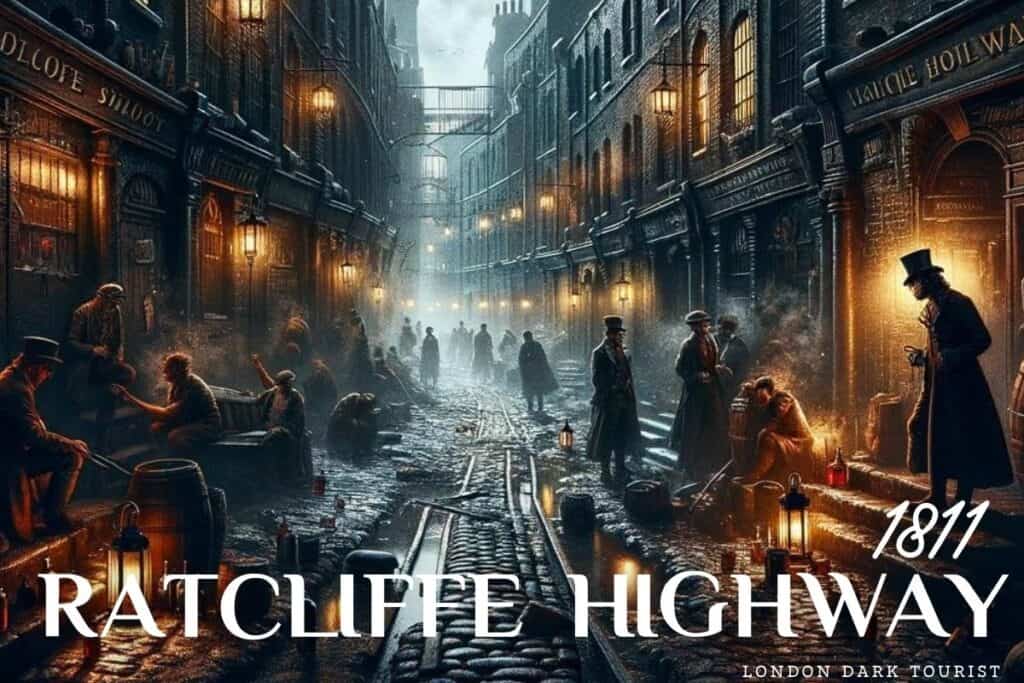
The Ratcliffe Highway, located in East London along the Thames, spanned the Ratcliffe waterfront. It was known as one of the most crime-ridden streets in all of London.
It was a collection of pubs, brothels, lodging houses, opium dens, and dense tenement housing.
Today, it’s just called “The Highway,” a heavily trafficked route in and out of London. Little trace of its dark past remains.
But when our story takes place, this area was full of poverty – everyone was just trying to survive in this difficult place.
The Marr Family

Timothy Marr, a former sailor for the East India Company, ran a linen draper’s shop on the Highway. The Marr shop was located at 29 Ratcliffe Highway, with the shop front on the ground floor and living quarters above.
Timothy’s wife Celia also worked with him at the business, and their family had recently expanded. Celia had given birth to baby Timothy just 14 weeks earlier.
Also living in the house was a young servant girl named Margaret Jewell, as well as Timothy’s apprentice James Gowan.
December 7, 1811: 29 Ratcliffe Highway

December 7th was a Saturday, the busiest day for shopkeepers in London. A long day’s work behind them, and another one ahead, the family began closing up shop for the evening.
Just before midnight, Timothy and Celia sent their servant girl Margaret out for a midnight snack of oysters (a common and cheap food at the time).
Margaret left on her mission, but their preferred oyster vendor was closed, so she had to backtrack to another shop. She passed back by the Marr shop on her route, and saw the family closing up shop by candlelight.
After procuring the oysters, Margaret returned just 20 minutes later. The door to the shop was locked.
Confused, Margaret knocked harder. The entire shop and living quarters were dark.

She heard the faint cry of baby Timothy, so she was very puzzled that the Marrs weren’t letting her in. They were clearly still awake, and she hadn’t been gone long.
Putting her ear to the door, she heard steps inside, then the sound of someone running away from the back of the shop. It sounded like someone had just left down the back steps.
Margaret persisted knocking until the night watchman was summoned by the noise. She explained the situation, and they both knocked until they woke the neighbor.
The neighbor decided to hop their shared fence and go to the back entrance. At the rear of the shop there was a light on, and the back door was wide open.
It was completely silent inside.
The Marr Family Murders: Bodies Discovered

Near the stairs was the blood-drenched body of the apprentice James Gowan. His face was smashed in, as if by a hammer.
Horrified, the neighbor rushed through the house to let the night watchman in the front entrance.
In his haste and in the dark, he tripped over the body of Celia. Her face was also smashed in, with blood still flowing onto the shop floor.
He let the night watchman in and told Margaret to stay outside. The two searched the rest of the shop and discovered Timothy Marr behind the counter. He had also been bludgeoned to death.
Running upstairs to check on the baby, they tragically found baby Timothy in the same state as his parents.
A Crowd Gathers Outside 29 Ratcliffe Highway

As the Thames River Police were summoned (the only organized police force of the era), a crowd gathered outside the shop as word of the tragedy quickly spread.
Entering the shop, authorities quickly located the murder weapon: a ship-builder’s hammer (also called a “maul”), with blood and human hair attached.
The hammer was located in the upstairs bedroom next to the baby, implying that young Timothy had been killed last.
Margaret had heard the baby cry – did her knocking interrupt the murderer, then he quickly killed the baby and fled? Or was he in the process of killing the baby when she knocked?
Searching the shop, there were no obvious signs of theft. None of the day’s profits were stolen.
Two sets of footprints were spotted leaving the shop, leaving the police to surmise that they were looking for two perpetrators (this will be important later).
The following day, the bodies of Timothy Marr, Celia Marr, and James Gowan were put in the street on display. This was a common macabre custom of the era, which brought gawkers and mourners alike to the Ratcliffe Highway.
Their funerals were held with a large procession walking the streets of the Highway, and the bodies were buried in nearby St George in the East.
The Hammer & The Coroner’s Inquest

After authorities washed away the blood and hair from the murder weapon, a pair of initials were located on the hammer: “J.P.” or “I.P.” – it was hard to tell which.
Ten days after the murder, the coroner’s inquest was held. They surmised that someone had been watching the shop because of the timing of the murder.
The murder must have been between 11:55 pm and 12:15 am, given Margaret’s timing of her errands. Either the killer was waiting for there to be less people inside, or it was just very fortuitous timing for young Margaret.
Various suspects were put forth, but nothing concrete connected anyone to this horrific crime.
The King’s Arms & The Williamsons

Just 12 days after the brutal killings at 29 Ratcliffe Highway, the killer struck again.
At 81 New Gravel Lane – just half a mile from the Marr family shop – sat The King’s Arms pub.
John Williamson, 56 years old, had run the pub for the past 15 years with his wife Elizabeth, age 60.
Living with them was their servant Bridget Anna Harrington (late 50s), their granddaughter Kitty (age 14), and a lodger called John Turner.
The couple were known to keep a tidy and no-nonsense establishment, which was rare in the lawless land of the Ratcliffe Highway area.
They regularly closed up shop and retired early, as they did on that fateful December night.
But were they being watched?
19 December 1811: 81 New Gravel Lane

That same evening, Mr Williamson had complained to a passing constable that he had seen a strange man in the area who was listening at doors.
The constable assured him that he would keep a lookout. It didn’t help.
As the constable continued on his rounds, he heard the cries of “Murder! Murder!”, and he raced back to the King’s Arms.
A crowd of people were outside the tavern, watching a man escape from the second floor window by climbing down a bedsheet.

It was John Turner, the Williamson’s lodger, and he frantically described a violent murder that he had just witnessed inside.
The crowd quickly broke down the front door, and found three bludgeoned bodies inside.
John Williamson – the proprietor – was hit in the head with an iron bar that lay next to him. His throat had been cut, blood still flowing from the wound.
His wife Elizabeth Williamson and the servant Bridget Harrington were found with their skulls smashed in. They had knife wounds so deep that bone shone bright white through the red blood.
14 year-old Kitty, thankfully, had slept through the whole ordeal in her bed upstairs, and emerged unharmed not knowing what had happened.
There were no major signs of theft, and only one item was missing from the scene: Mr Williamson’s pocket watch.
The Williamson Murder Investigation

Reports poured in about a suspicious man who had been seen loitering at the pub earlier in the day – could it have been the same man who was listening at doors?
At the inquest, the lodger John Turner described going to bed around 10:40pm, but shortly afterwards was awoken by the tavern door slamming open and Bridget screaming “we’re all murdered!”
He heard Mr Williamson scream, “I’m a dead man!” He then heard several blows, and crept downstairs to see if he could get a look at what was going on.
He saw a tall man – roughly 6’ in height – leaning over Mrs Williamson. He then tiptoed back upstairs and escaped out the window.
Since there was no forensic evidence at the time, all police had were witness reports like Turners’. How were these two sets of murders related? Were they related?
The Ratcliffe Highway Murders Investigation

The two sets of murders were immediately connected, though at first glance there was no affiliation between the families.
One suspect who kept coming under suspicion was John Williams, an immigrant sailor and former mutineer. He was tall and thin, just as the suspect witnesses had described.
Once they continued pursuing Williams, his connections to the Marr family got deeper and deeper, and then two other suspects emerged.
Before Marr was a shopkeeper, he had been a sailor working for a popular trading company.
It turns out that a small group of sailors were intertwined with Marr – they had all worked together aboard the same ship for the British East India Company.
More Suspects: Hart & Ablass

John Williams (the prime suspect) knew Timothy Marr. They had worked together in their former lives at sea.
Williams had further connections to the Marr family: he knew a carpenter who had worked at the Marr shop the day of the murders. Carpenter Cornelius Hart was also a former sailor who had worked on the same ships.
Hart’s story was curious: he claimed to have left a chisel at the Marr shop the day of the murders, and went back after the murders to retrieve it. He removed it from the shop, therefore removing evidence from a crime scene.
After Williams’ arrest, Hart sent a message asking if Williams was to be detained. Why would he be so concerned with his friend’s arrest? Was he in on it?
Another curious suspect connected to the former sailors was William “Long Billy” Ablass, who was friends with both of them and also seemed to know (or know of) Marr.
The two were seen drinking together at the King’s Arms the day of the pub murders, and Ablass better fit Turner’s description of a very tall man.
These three – John Williams, Cornelius Hart, and William Ablass – were all connected somehow, and the brutality and speed of the murders did certainly suggest more than one perpetrator.
Plus, there were those two sets of footprints leaving the Marr shop.
John Williams Arrested

Police thought they had figured out whodunnit and arrested Williams, taking him to Coldbath Fields Prison.
Through interviews with him and with his acquaintances, they found some damning evidence, or at least circumstantial evidence.
The night of the murders, his landlady said Williams had returned home late to his lodging house with blood on his shirt. Williams protested that it was from a pub brawl.
On Christmas Eve, authorities searched his lodging house, The Pear Tree, and found more evidence.
The Damning Evidence: The Maul
Also living in The Pear Tree lodging house with Williams was a sailor – John Peterson (remember the initials on the hammer: J.P.?) – who was currently away at sea.
In Peterson’s trunk at the lodging house, all his belongings were accounted for, except for his maul (a ship-builder’s hammer).
Police surmised that Williams would likely have had the opportunity to take the maul, since Peterson was not there to stop him or even notice it was gone.
Further evidence piled up against him: Williams’ laundress testified that she had washed his bloody and torn clothing after the Marr murders.
John Williams: Ratcliffe Highway Murderer?

Before John Williams could be tried for the murders, he was found hanging in his cell in Coldbath Fields Prison on December 28, 1811.
His body was paraded through the streets and taken to the crossroads of Cannon Street and Cable Street. In a hole dug in the centre of the road, they placed his body in the ground.
Driving a stake through his heart (possibly to prevent his “spirit from wandering”) and covering his body in quicklime was their final punishment.
After his death, police again searched his room in The Pear Tree boarding house.
Hidden away was a bloody pair of trousers, and the pocket watch belonging to the slain Mr Williamson.
This confirmed that Williams was likely the killer they had been searching for. But were any of his friends in on it?
We may never know.

In 1886, at the intersection where his body was buried, gasworks accidentally uncovered his skeleton.
Kept as a gruesome treasure at the Crown & Dolphin pub (that sits on the corner of the intersection) was John Williams’ skull.
The skull is long gone today, though the pub only closed down recently.
Remembering the Ratcliffe Highway Murder Victims

The four Marr family victims – Timothy Marr, Celia Marr, Timothy Jr. and James Gowan – were buried under a memorial at St George in the East.
Their infant son had been baptised at the same church only months earlier.
Today only a small fragment of their gravestone remains.
The Williamsons and Bridget Harrington were given a memorial service and buried at St Paul’s, Shadwell. Their gravestone can no longer be located.
What Really Happened?
It’s fairly obvious that John Williams was one of the killers, and had the most evidence stacked against him. But what about Hart & Ablass?
Marr, Hart, Ablass and Williams had all worked together at the East India Company. Were they jealous that Marr got out and was making a living on his own? Or was there some other beef between the four?
My guess is that Hart, Ablass and Williams were all in on it together, either to exact revenge, murder Marr out of jealousy, or to rob him. Hart knew the layout of the shop, as he had been working there doing some building.
Whomever went to the Marr shop that night was interrupted by Margaret Jewell knocking, and got away before being caught or robbing the Marrs.
Unsatiated, they moved onto the King’s Arms Pub days later. They knew this establishment well, as they had all been frequent patrons.
But this murder was also interrupted by Turner, who climbed out the window screaming.
Though John Williams was the only official suspect, I surmise that more than one of the sailors was in on the crime. Their motive? We’ll never know.
The Ratcliffe Highway Murders Sites Today

29 Ratcliffe Highway is long gone, and today the road is simply called “the Highway.”
It’s surmised that the space where the Marr shop used to be is now (approximately) 60 The Hwy, London E1W 2BF.
For a while it was a car dealership, and now it seems to be a ghost kitchen for food delivery apps.

81 New Gravel Lane today is Garnet Street, which runs between Shadwell Basin and Wapping Woods.
The only remains of the old days are the original dock wall, stretching across pieces of Garnet Street, now home to several residential developments.
At the intersection where John Williams was buried, the Crown and Dolphin still stands, though it closed a while back.
Today the intersection is still Cannon Street Road and Cable Street.
See my Macabre London Map for all sites related to the Ratcliffe Highway murders and all of London’s dark historic places.
Sources
More Historic London Murders
10 Rillington Place Today: Notorious Murder House Then & Now
7 Important Reasons Jack the Ripper Was Never Caught
The Acid Bath Murders: John George Haigh Becomes a Monster
Kray Walking Tour of East London: 7 Free Spots You Can See Today
The Muffin Man Murders: Death on Drury Lane?
Secrets of a Serial Killer: Uncovering the Truth About John Reginald Christie
Delia Balmer’s Story: Her Miraculous Survival of John Sweeney
Famous London Murders: The Tragic Love of Joe Orton and Kenneth Halliwell


